Deploying a Qwik City application to Cloudflare Pages from GitHub Actions
5 min readA quick guide on how to deploy a Qwik-City project to Cloudflare Pages from GitHub Actions.
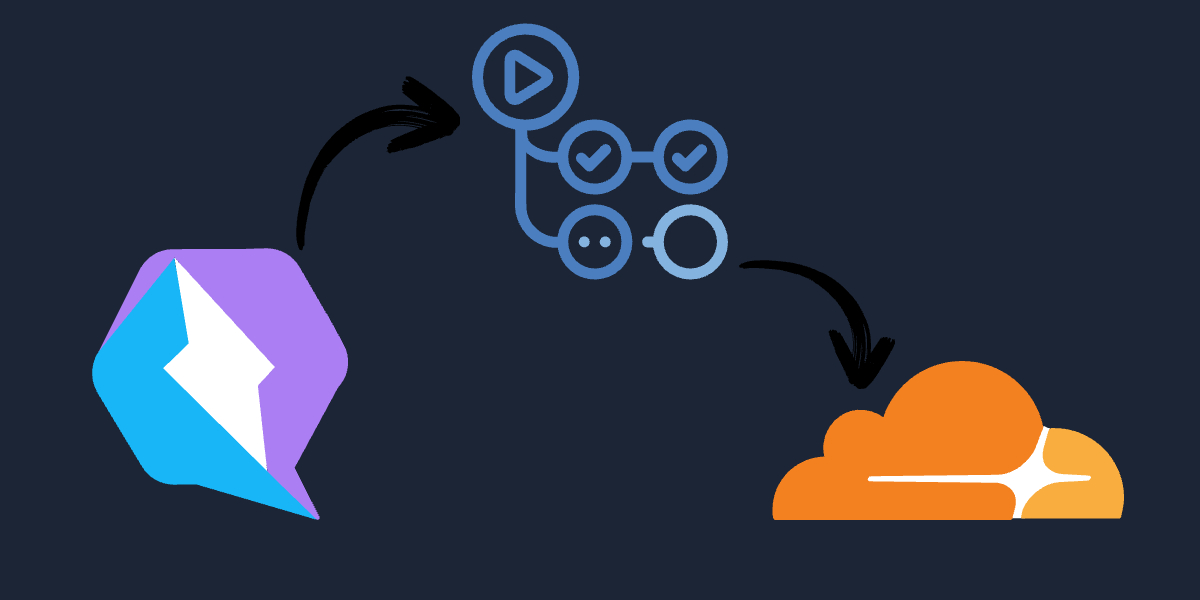 An image of the Qwik, GitHub Actions, and Cloudflare logos.
Introduction
There are times when we want to be able to not think about deploying our applications and services like Cloudflare Pages have direct integrations with GitHub to automagically deploy our applications when we push to a specific branch. That is great and all but what if we want more fine grained control over that process? What if we only want a deployment to happen if other steps in our CI succeed (i.e. linting, test, etc)? In this post we will look at how to deploy a Qwik-City project to Cloudflare Pages via our own workflow on GitHub Actions.
Getting what we need from Cloudflare
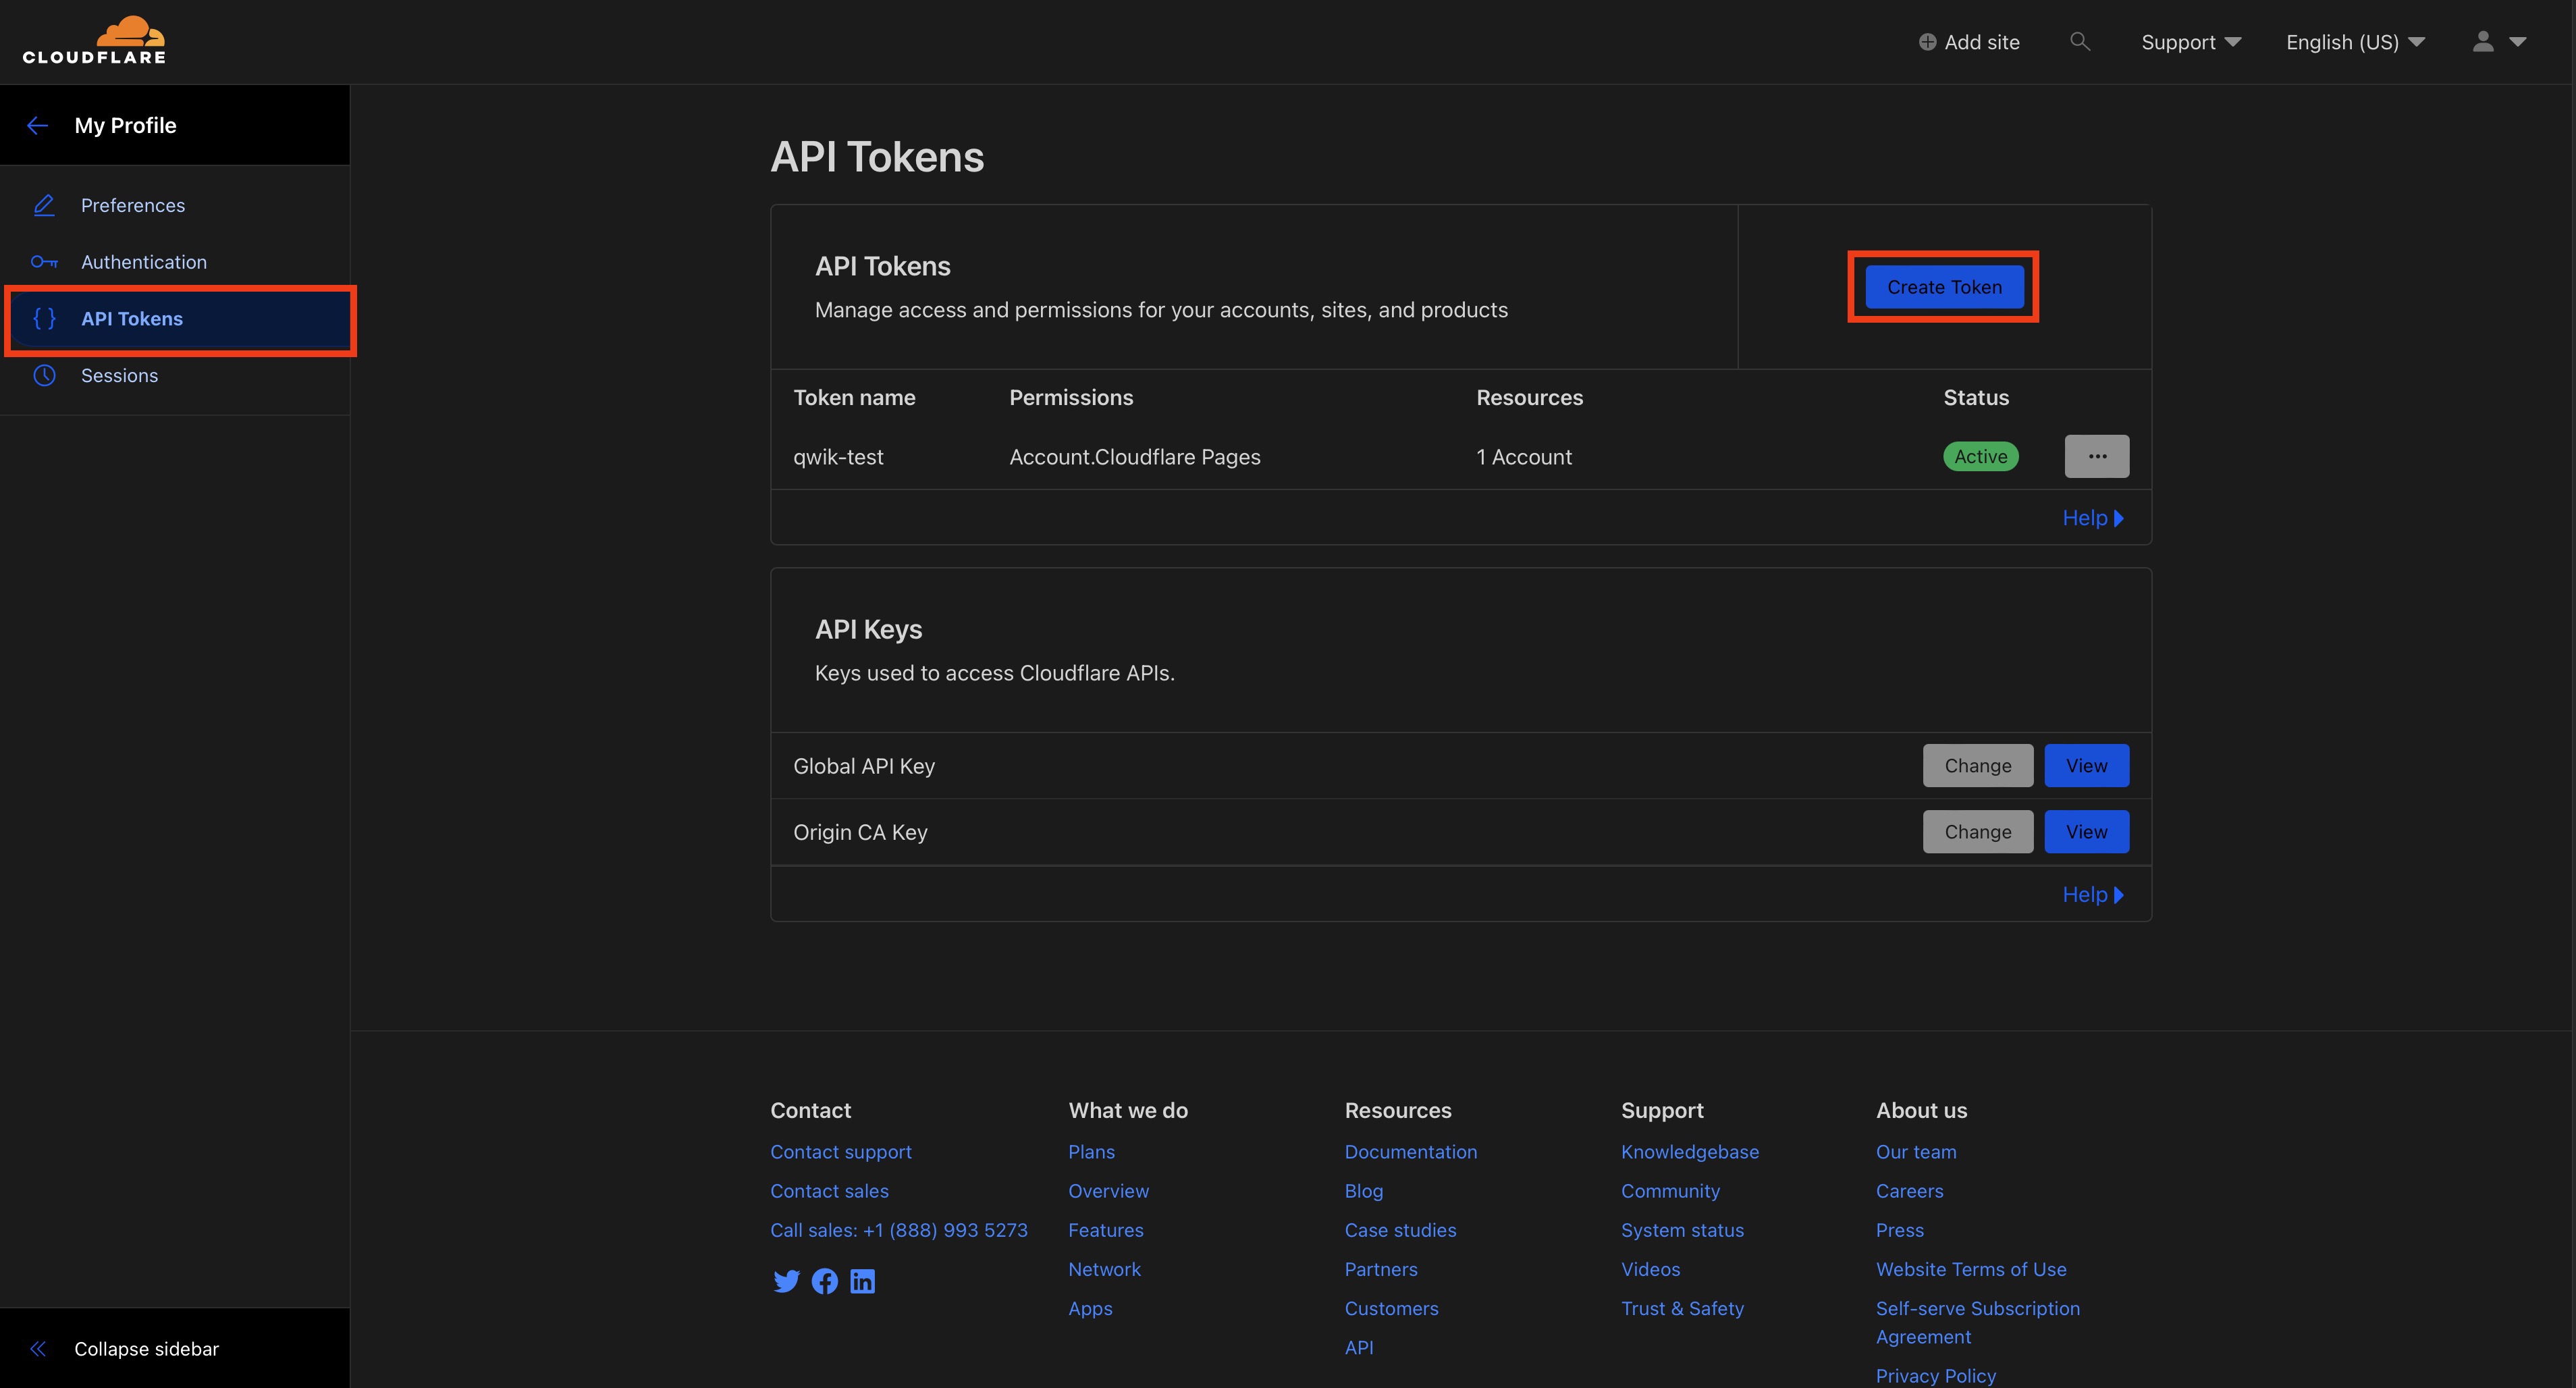
If you do not have a Cloudflare account you can sign up for one here. Once you have an account we can create our API token. Find the "My Profile" tab in the top right corner of the dashboard and click on it. Then click on "API Tokens" in the left column. Then click on "Create Token" in the right column.
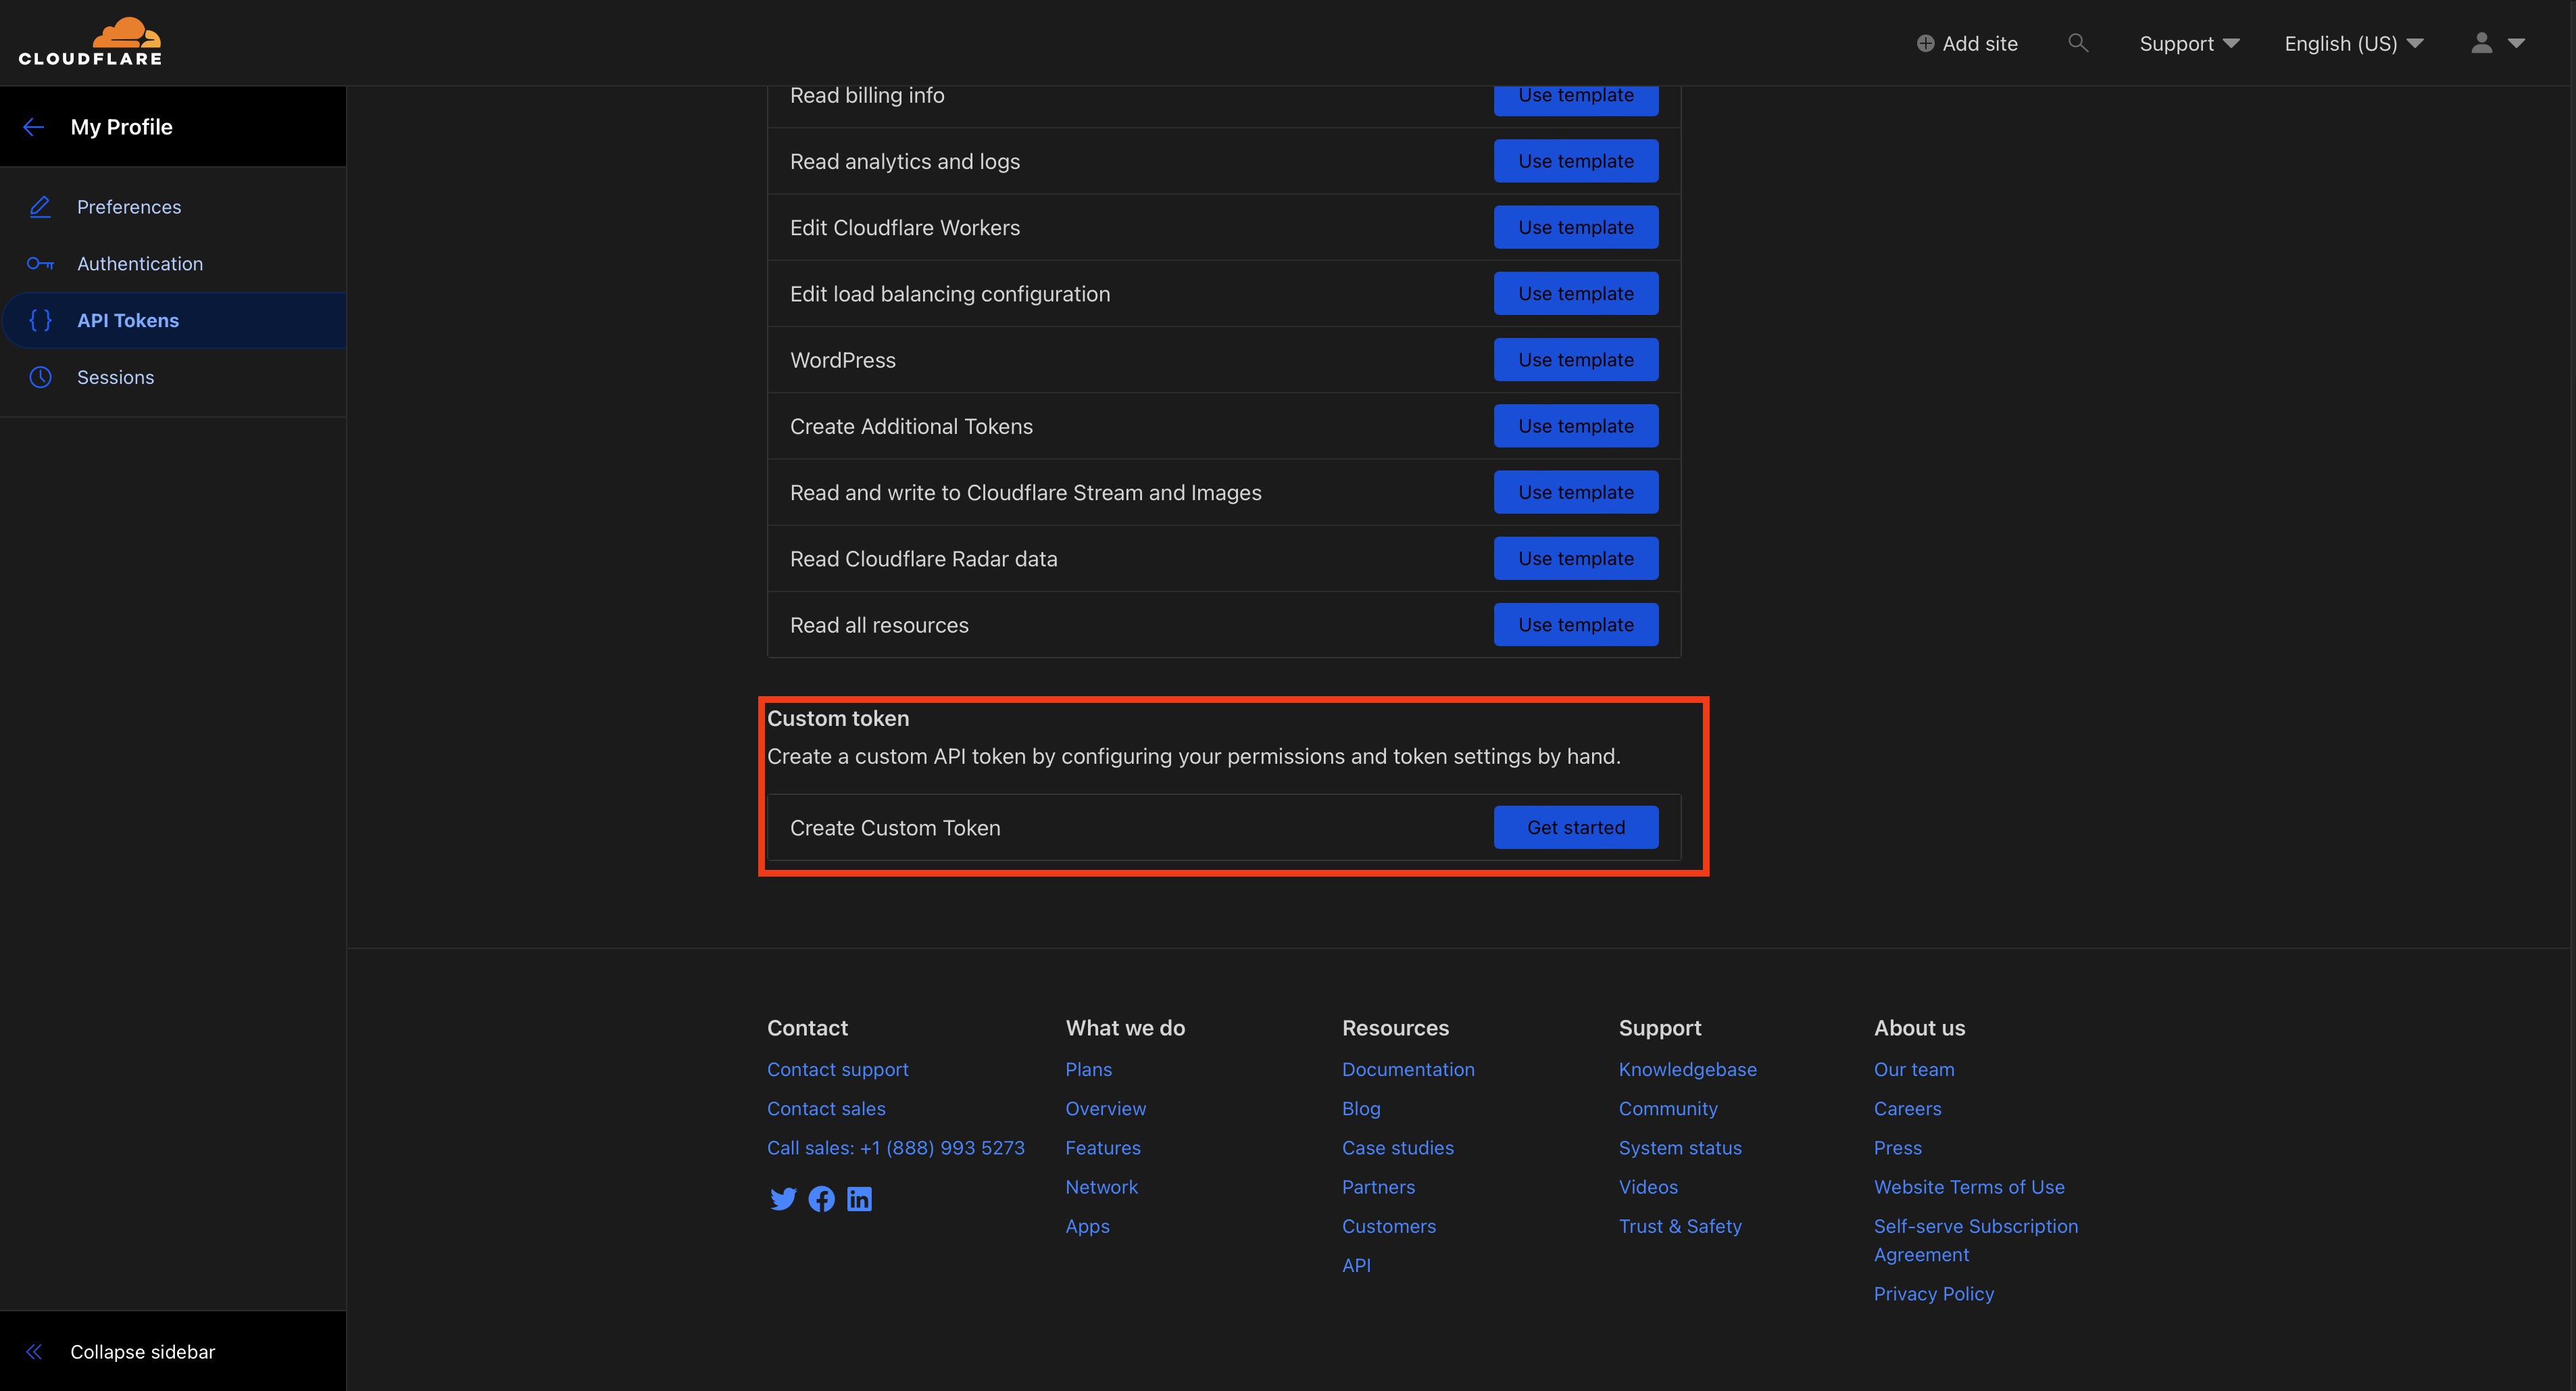
At the bottom of the "Create Token" page you will find a "Custom Token" option. That is what we will need to choose to programmatically deploy to Cloudflare Pages from GitHub Actions.
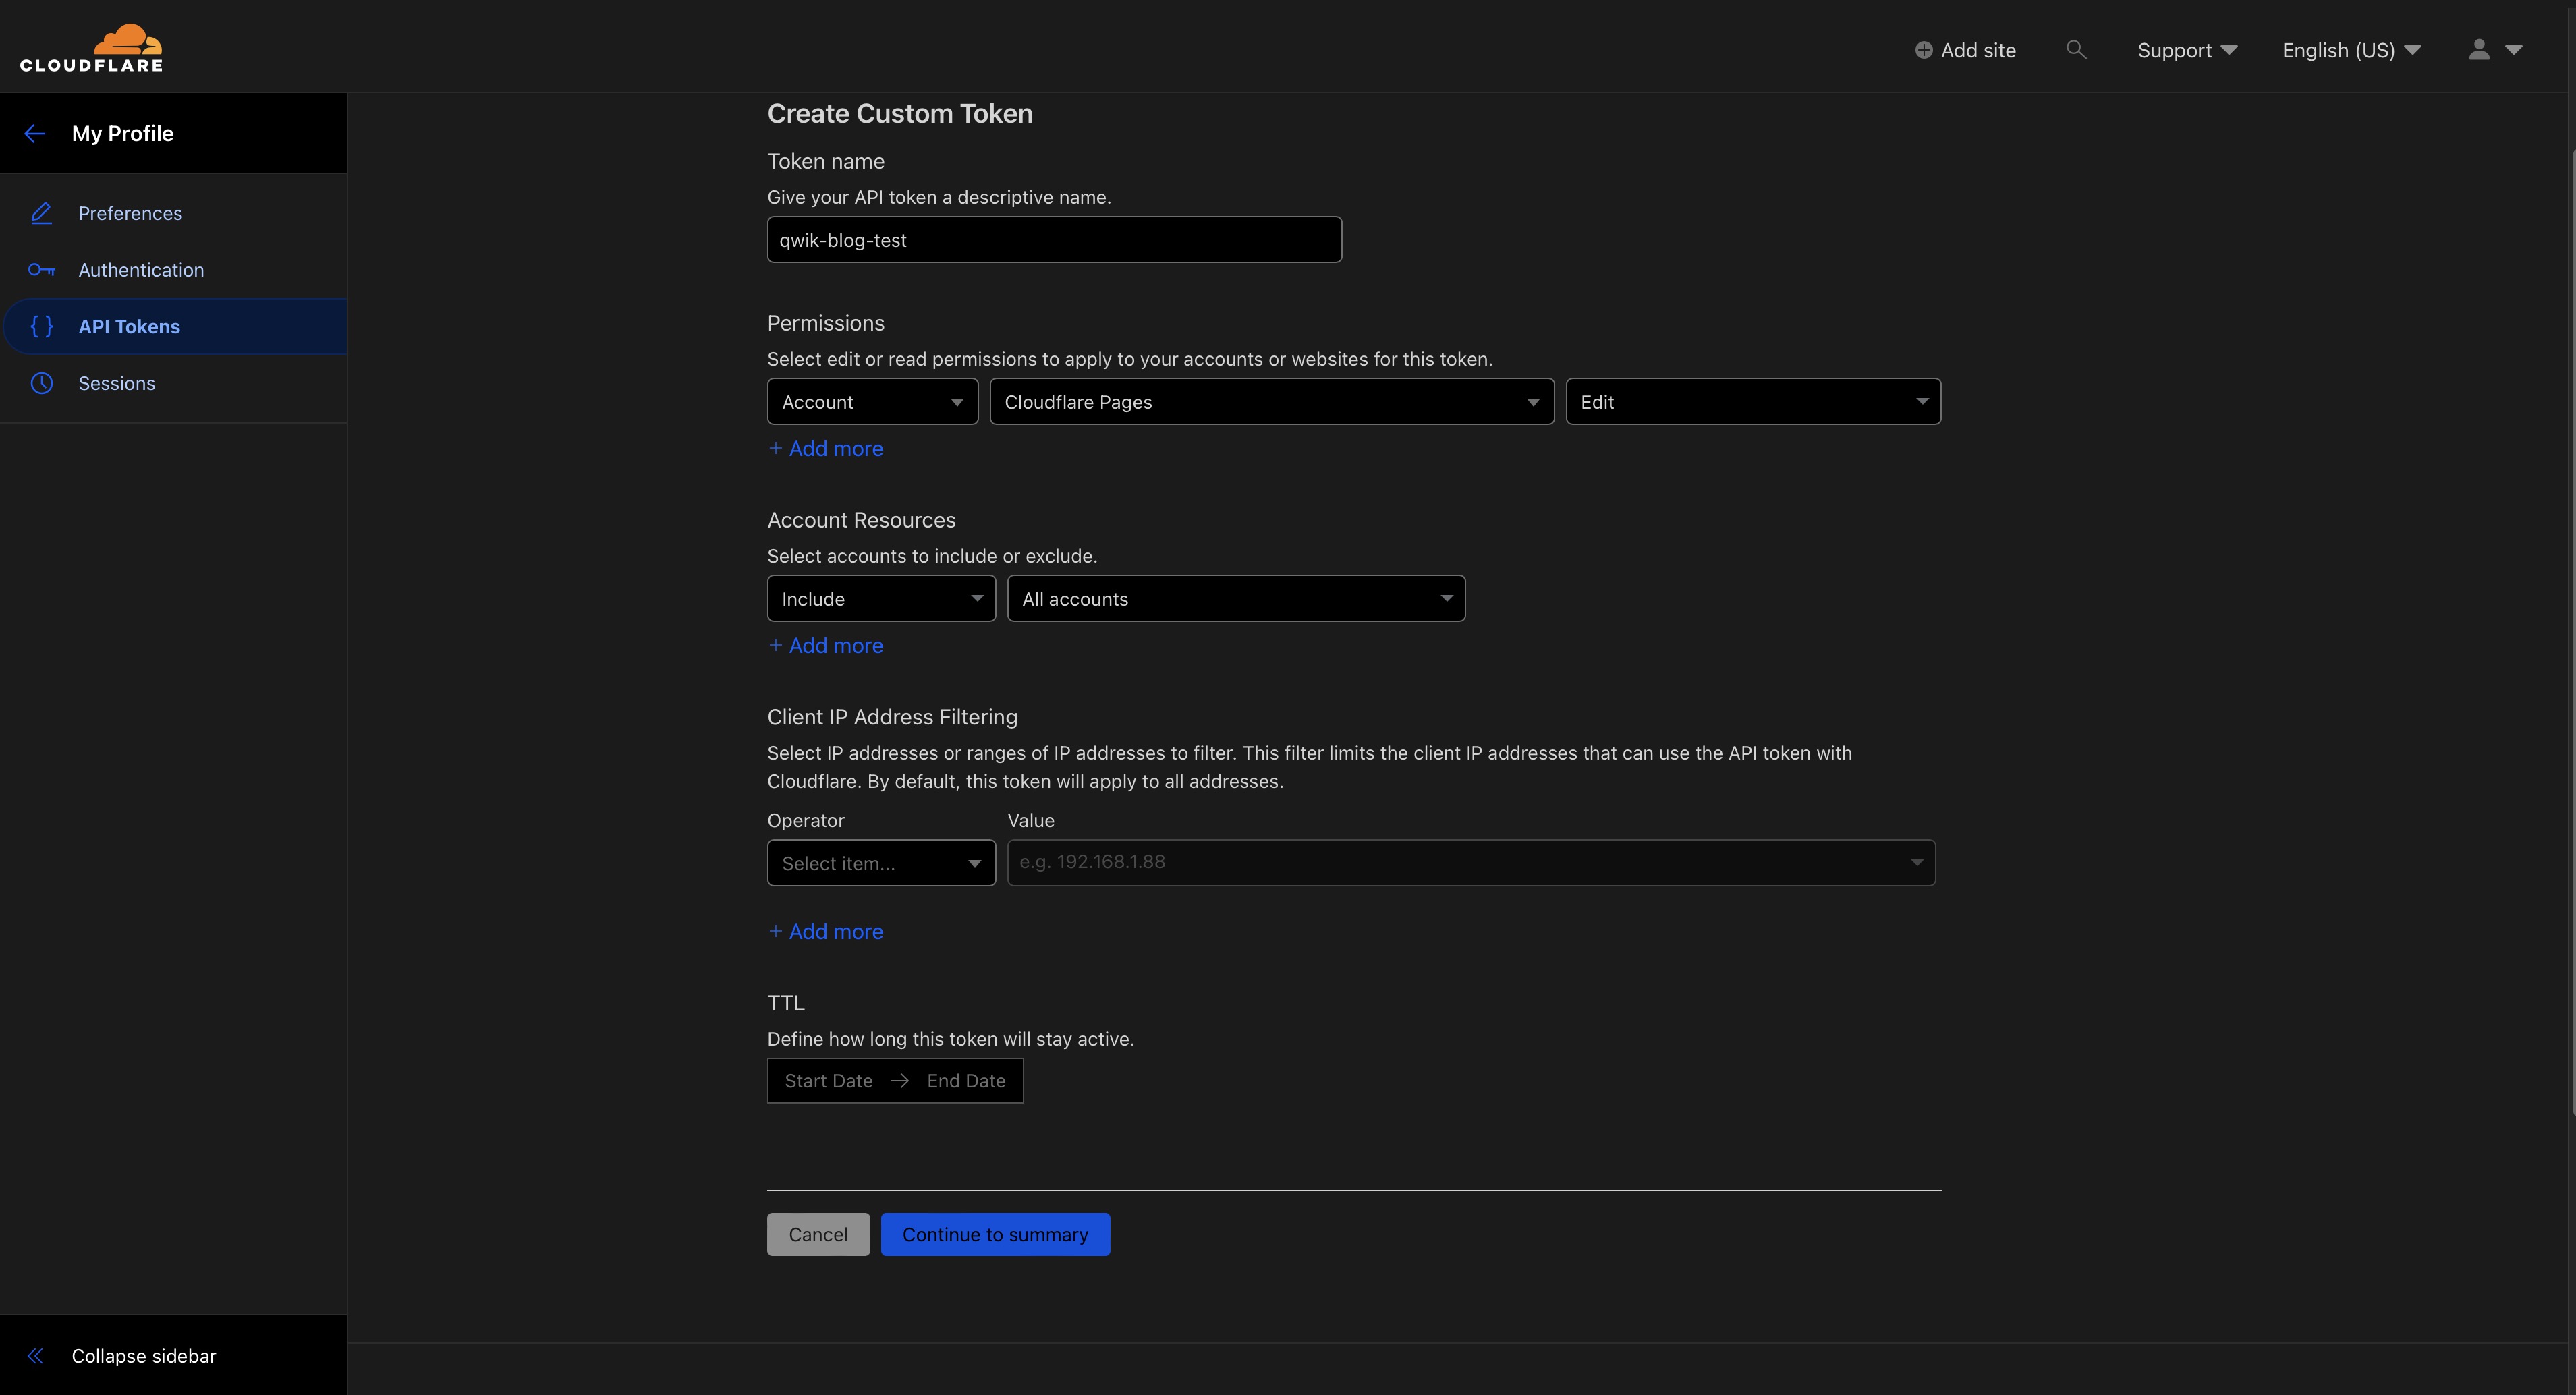
Name your token and give it the following permissions:
- Account
- Cloudflare Pages
- Edit
If you have multiple accounts and want to scope this token to a specific account you can do that here as well. Select the account you want to scope the token too in the
"Account Resources"section.
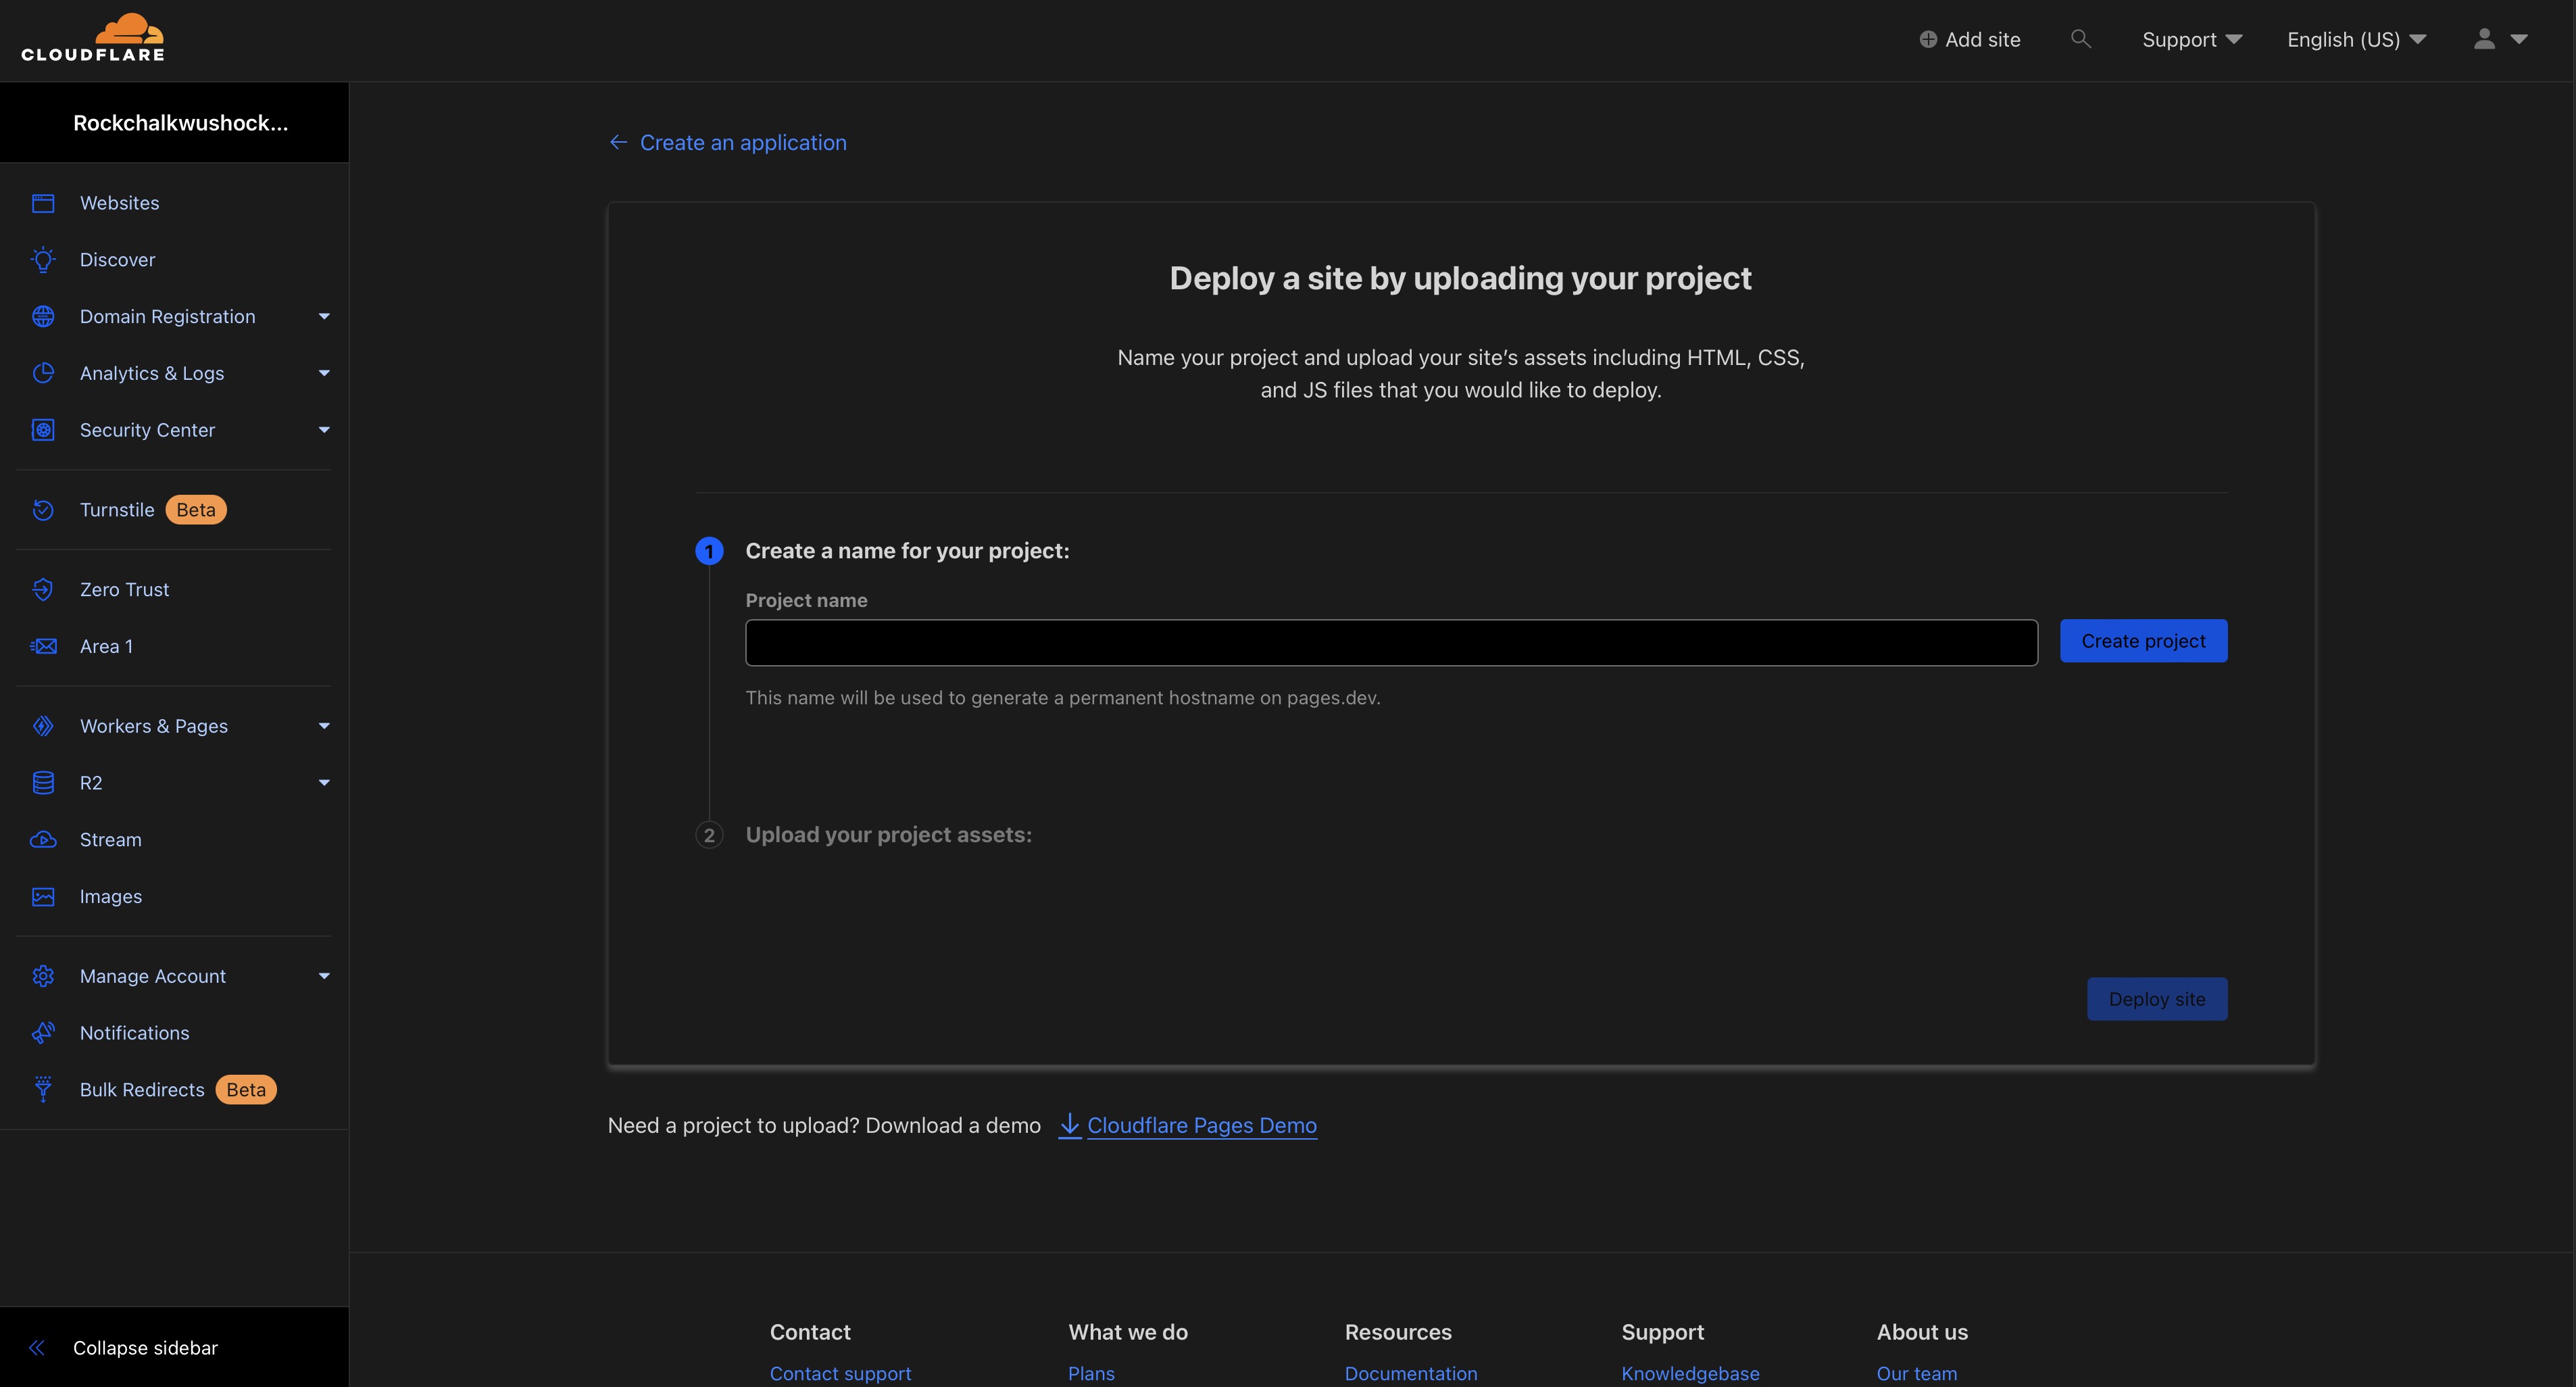
After you have your API token we need to setup a Direct Upload project via the Cloudflare Pages Dashboard. Whatever you name your project will be what we use for the projectName in the GitHub Actions workflow.

Once the project has been created we can now navigate back to the Cloudflare Workers & Pages Overview Dashboard and retrieve our Cloudflare Account ID. You will find it in the right hand column of the overview dashboard. This will be used in the GitHub Actions workflow.
We should now have the three things we need from Cloudflare:
- Cloudflare Account ID
- Cloudflare API Token
- Cloudflare Pages Project Name
Setting up GitHub
If you do not have a GitHub account you can sign up for one here. We can now create a new repository here. It should be an empty repository with no README, .gitignore, or license. You will be dropped off at a screen like the one below. Make sure you copy the following commands to use locally:
git remote add origin [email protected]:<username>/<repository-name>.git
git push -u origin production # this will be "main"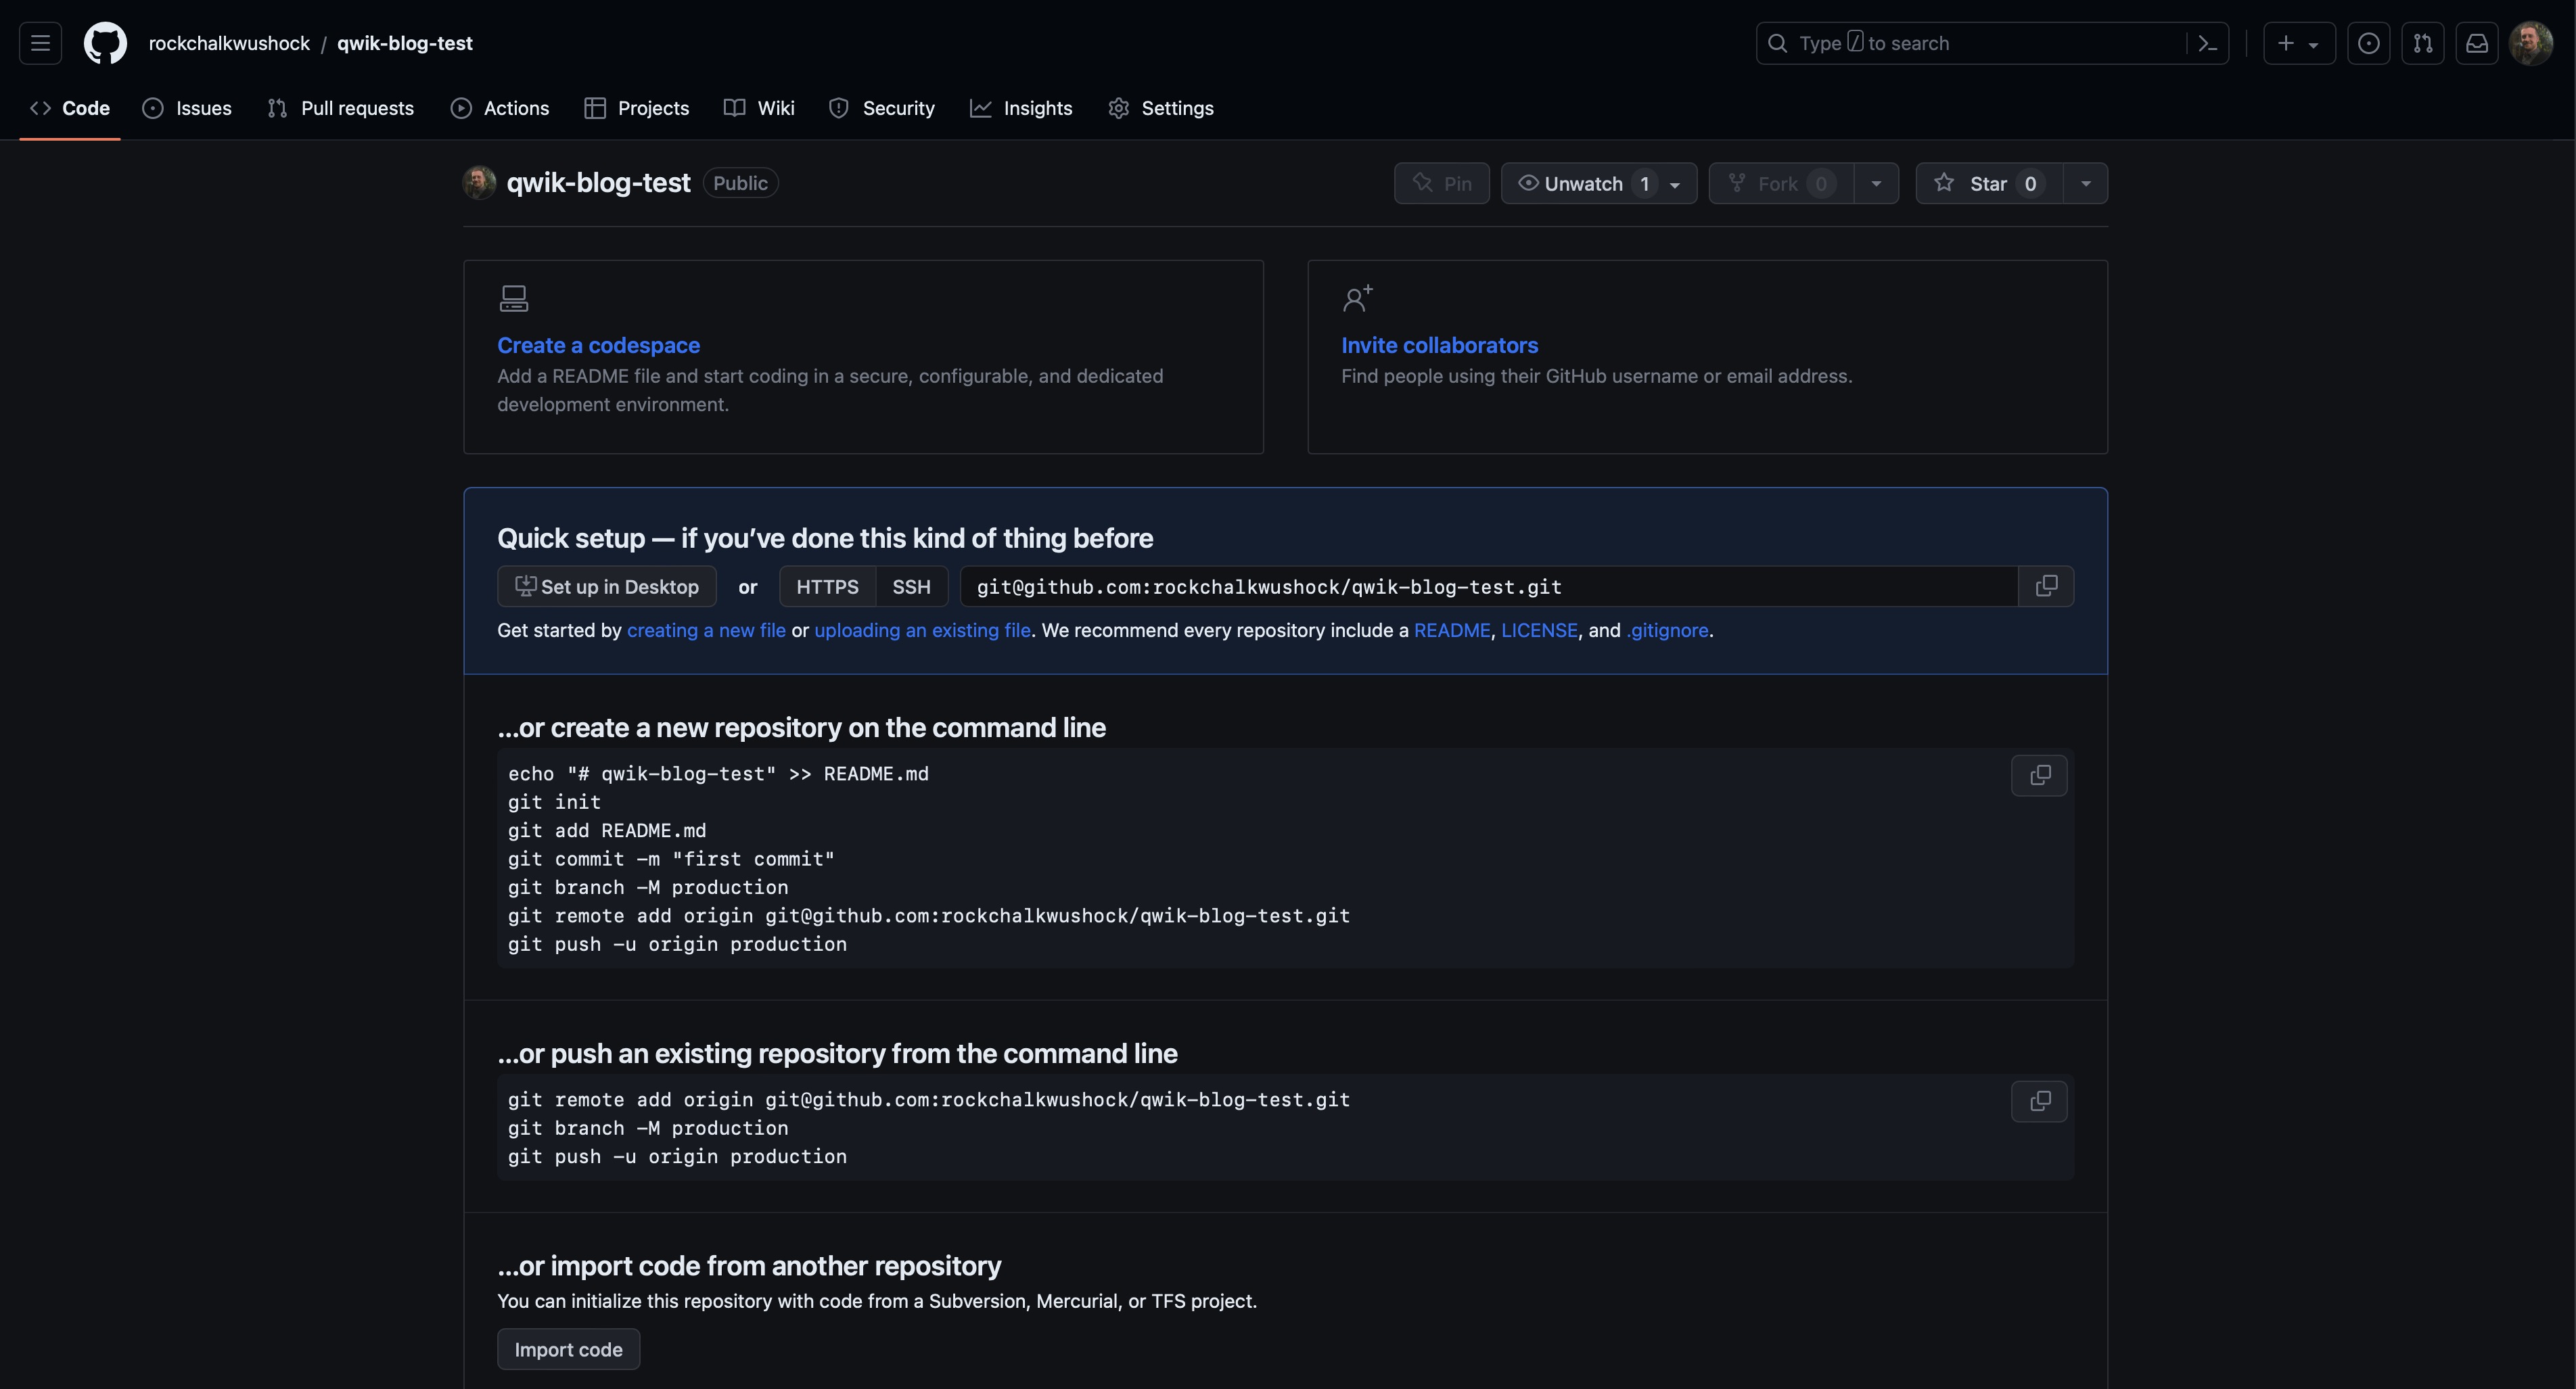
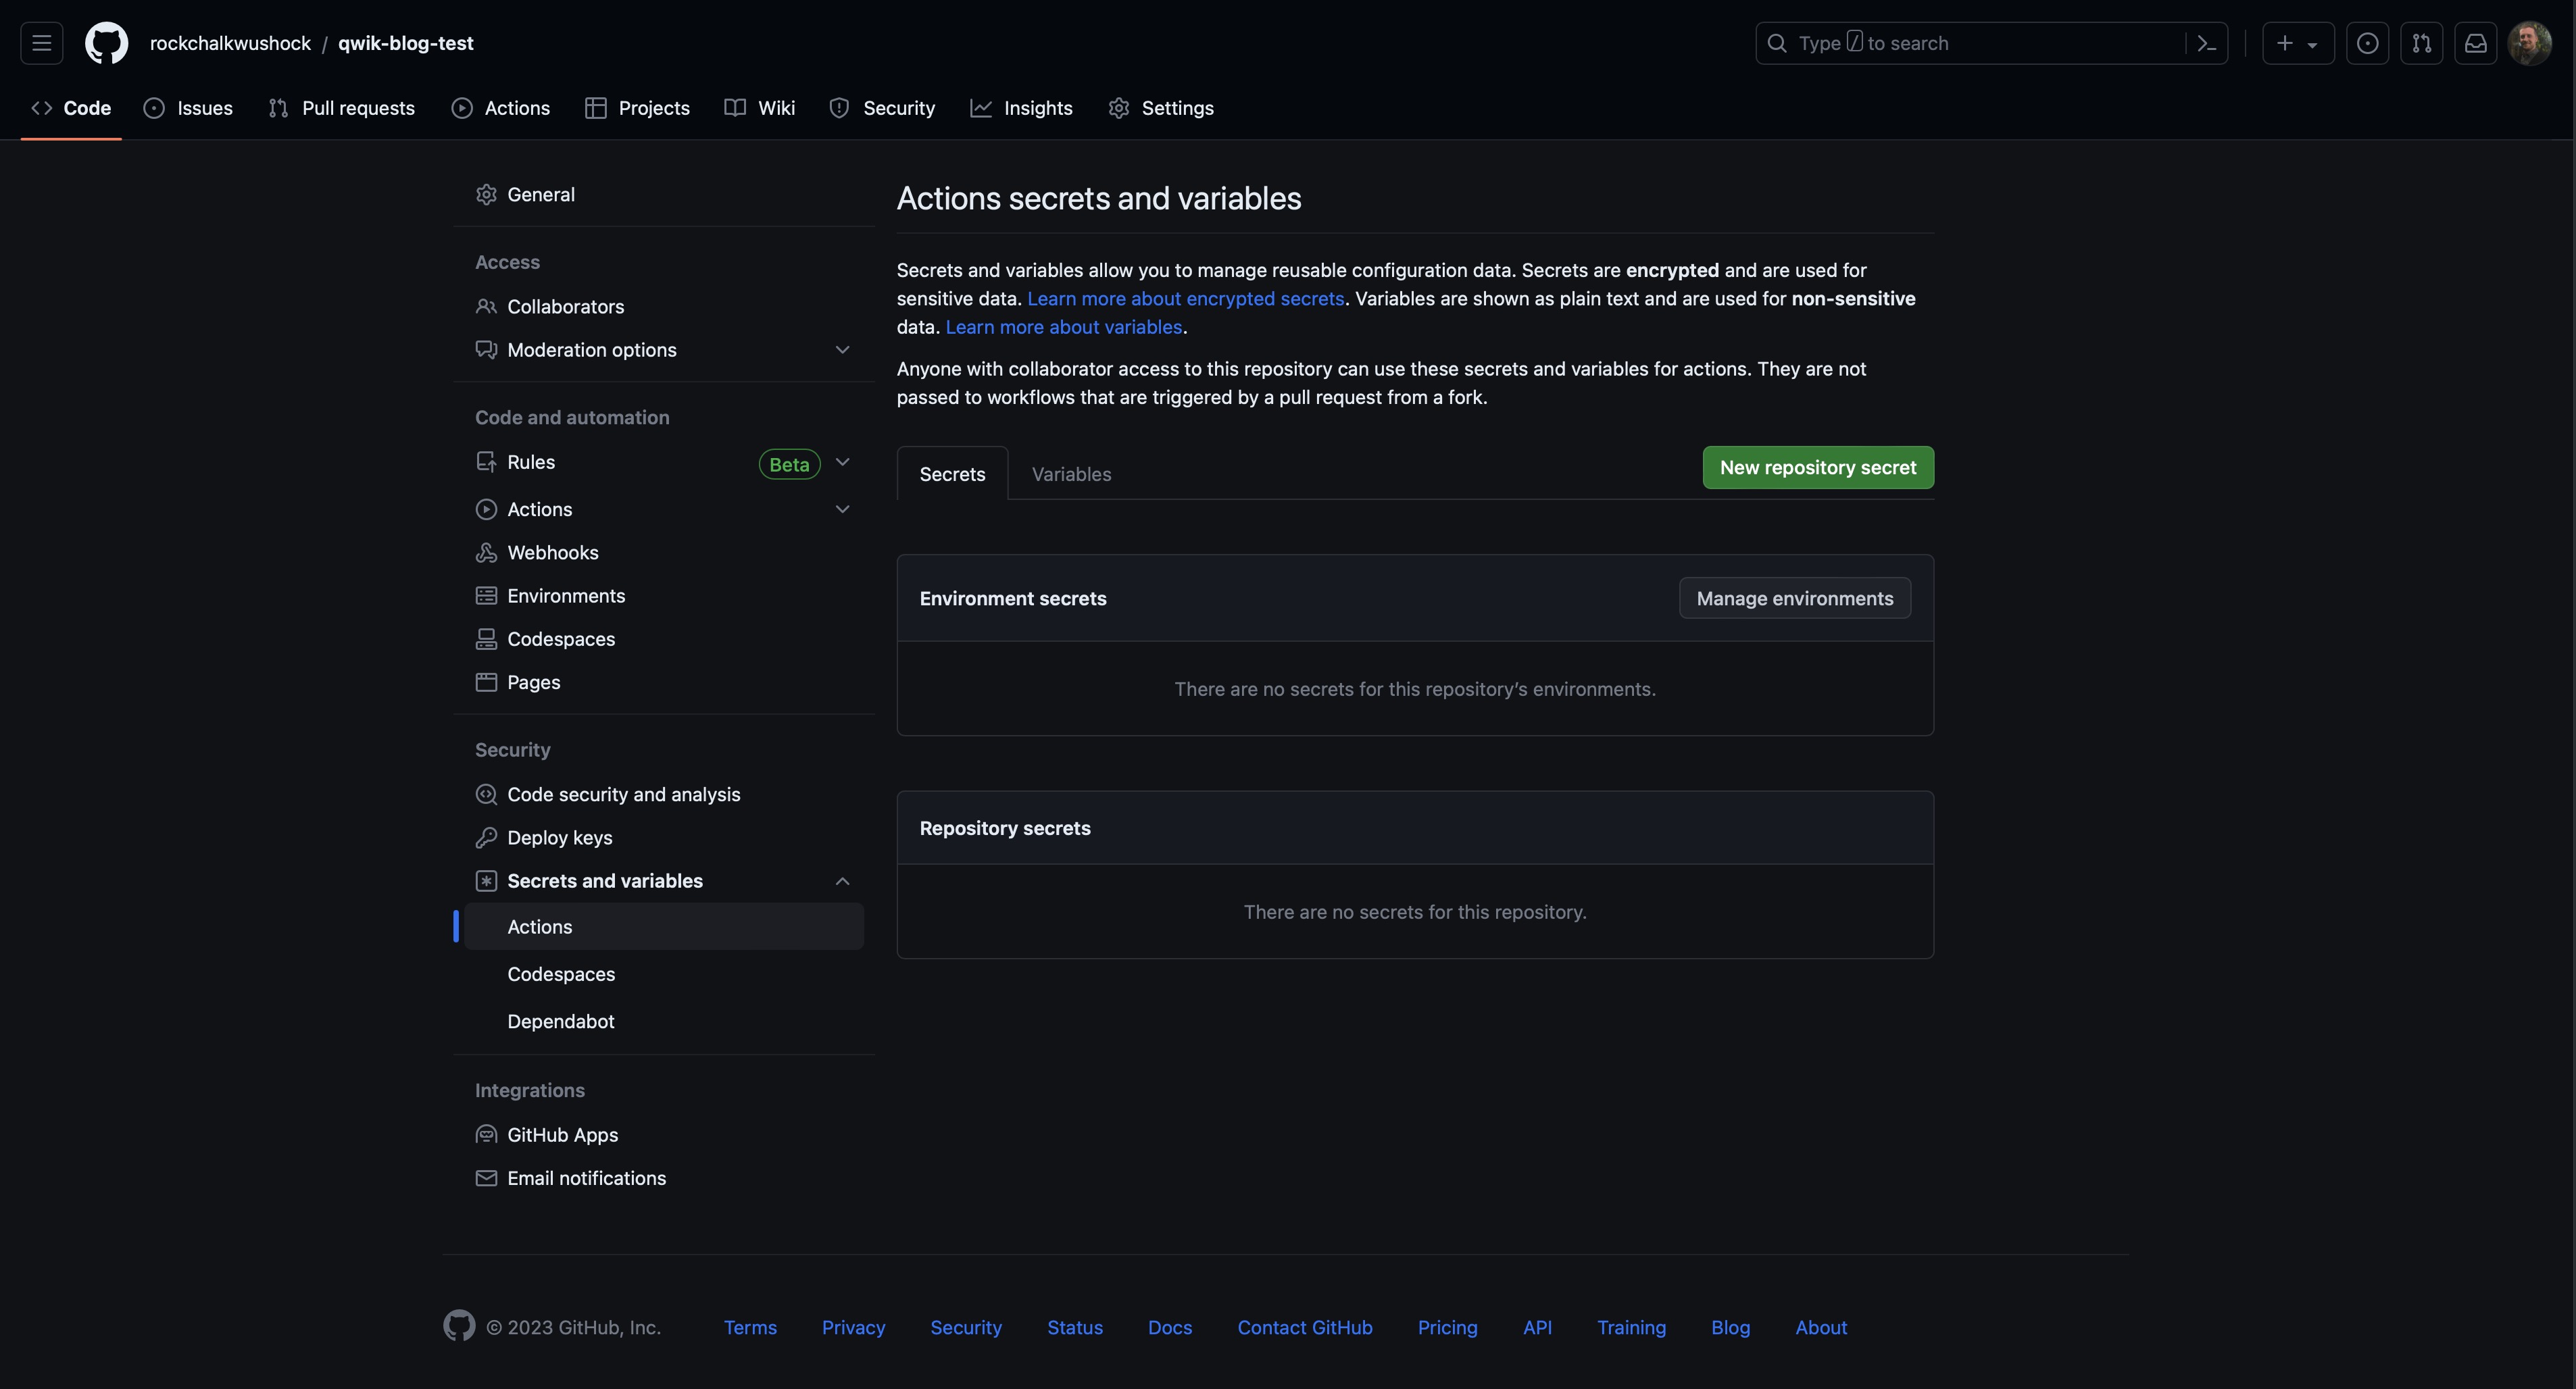
Once the repository has been created we can add the following secrets to the repository:
CLOUDFLARE_ACCOUNT_IDCLOUDFLARE_API_TOKEN
To do that we will need to go to:
Settings > Secrets & Variables > Actions > New repository secret
Setting up Qwik City
We can now create a new qwik-city project:
pnpm create qwik@latestSelect the basic app option that will give us a wokring template with qwik-city integrated into it. Once the project has been created we can add the Cloudflare Pages integration:
pnpm run qwik add cloudflare-pagesSetting up GitHub Actions
To add GitHub Actions to our repository we will need to create a new file in the .github/workflows directory called publish.yml. We can then add the following workflow to the file:
mkdir -p .github/workflows
touch .github/workflows/publish.yml
Cloudflare actually has and maintains there own GitHub Action for deploying to Cloudflare Pages. We will be using that in our workflow. You can find the GitHub Action here.
name: Publish

on:
  push:
    branches:
      - production # this will be "main"
      - staging # development branch
  pull_request:
    branches:
      - staging
    types:
      - edited
      - opened
      - synchronize

jobs:
  publish:
    name: Publish to Cloudflare Pages
    # This is very important don't miss it!
    permissions:
      contents: read
      deployments: write
    runs-on: ubuntu-latest
    strategy:
      fail-fast: true
      matrix:
        node-version: [18.x]
        pnpm-version: [8.x]
    timeout-minutes: 10

    steps:
      - uses: styfle/[email protected]
        with:
          access_token: ${{ github.token }}

      - uses: actions/checkout@v3
        with:
          fetch-depth: 2

      - uses: pnpm/[email protected]
        with:
          version: ${{ matrix.pnpm-version }}

      - uses: actions/setup-node@v3
        with:
          cache: 'pnpm'
          node-version: ${{ matrix.node-version }}

      - run: pnpm install --frozen-lockfile
      - run: pnpm run build
        env:
          NODE_ENV: production

      - uses: cloudflare/[email protected]
        with:
          accountId: ${{ secrets.CLOUDFLARE_ACCOUNT_ID }}
          apiToken: ${{ secrets.CLOUDFLARE_API_TOKEN }}
          directory: dist
          gitHubToken: ${{ github.token }}
          projectName: qwik-blog-test # your project name
Pushing to GitHub
We can now add the GitHub remotes and push to GitHub:
git remote add origin [email protected]:<username>/<repository-name>.git
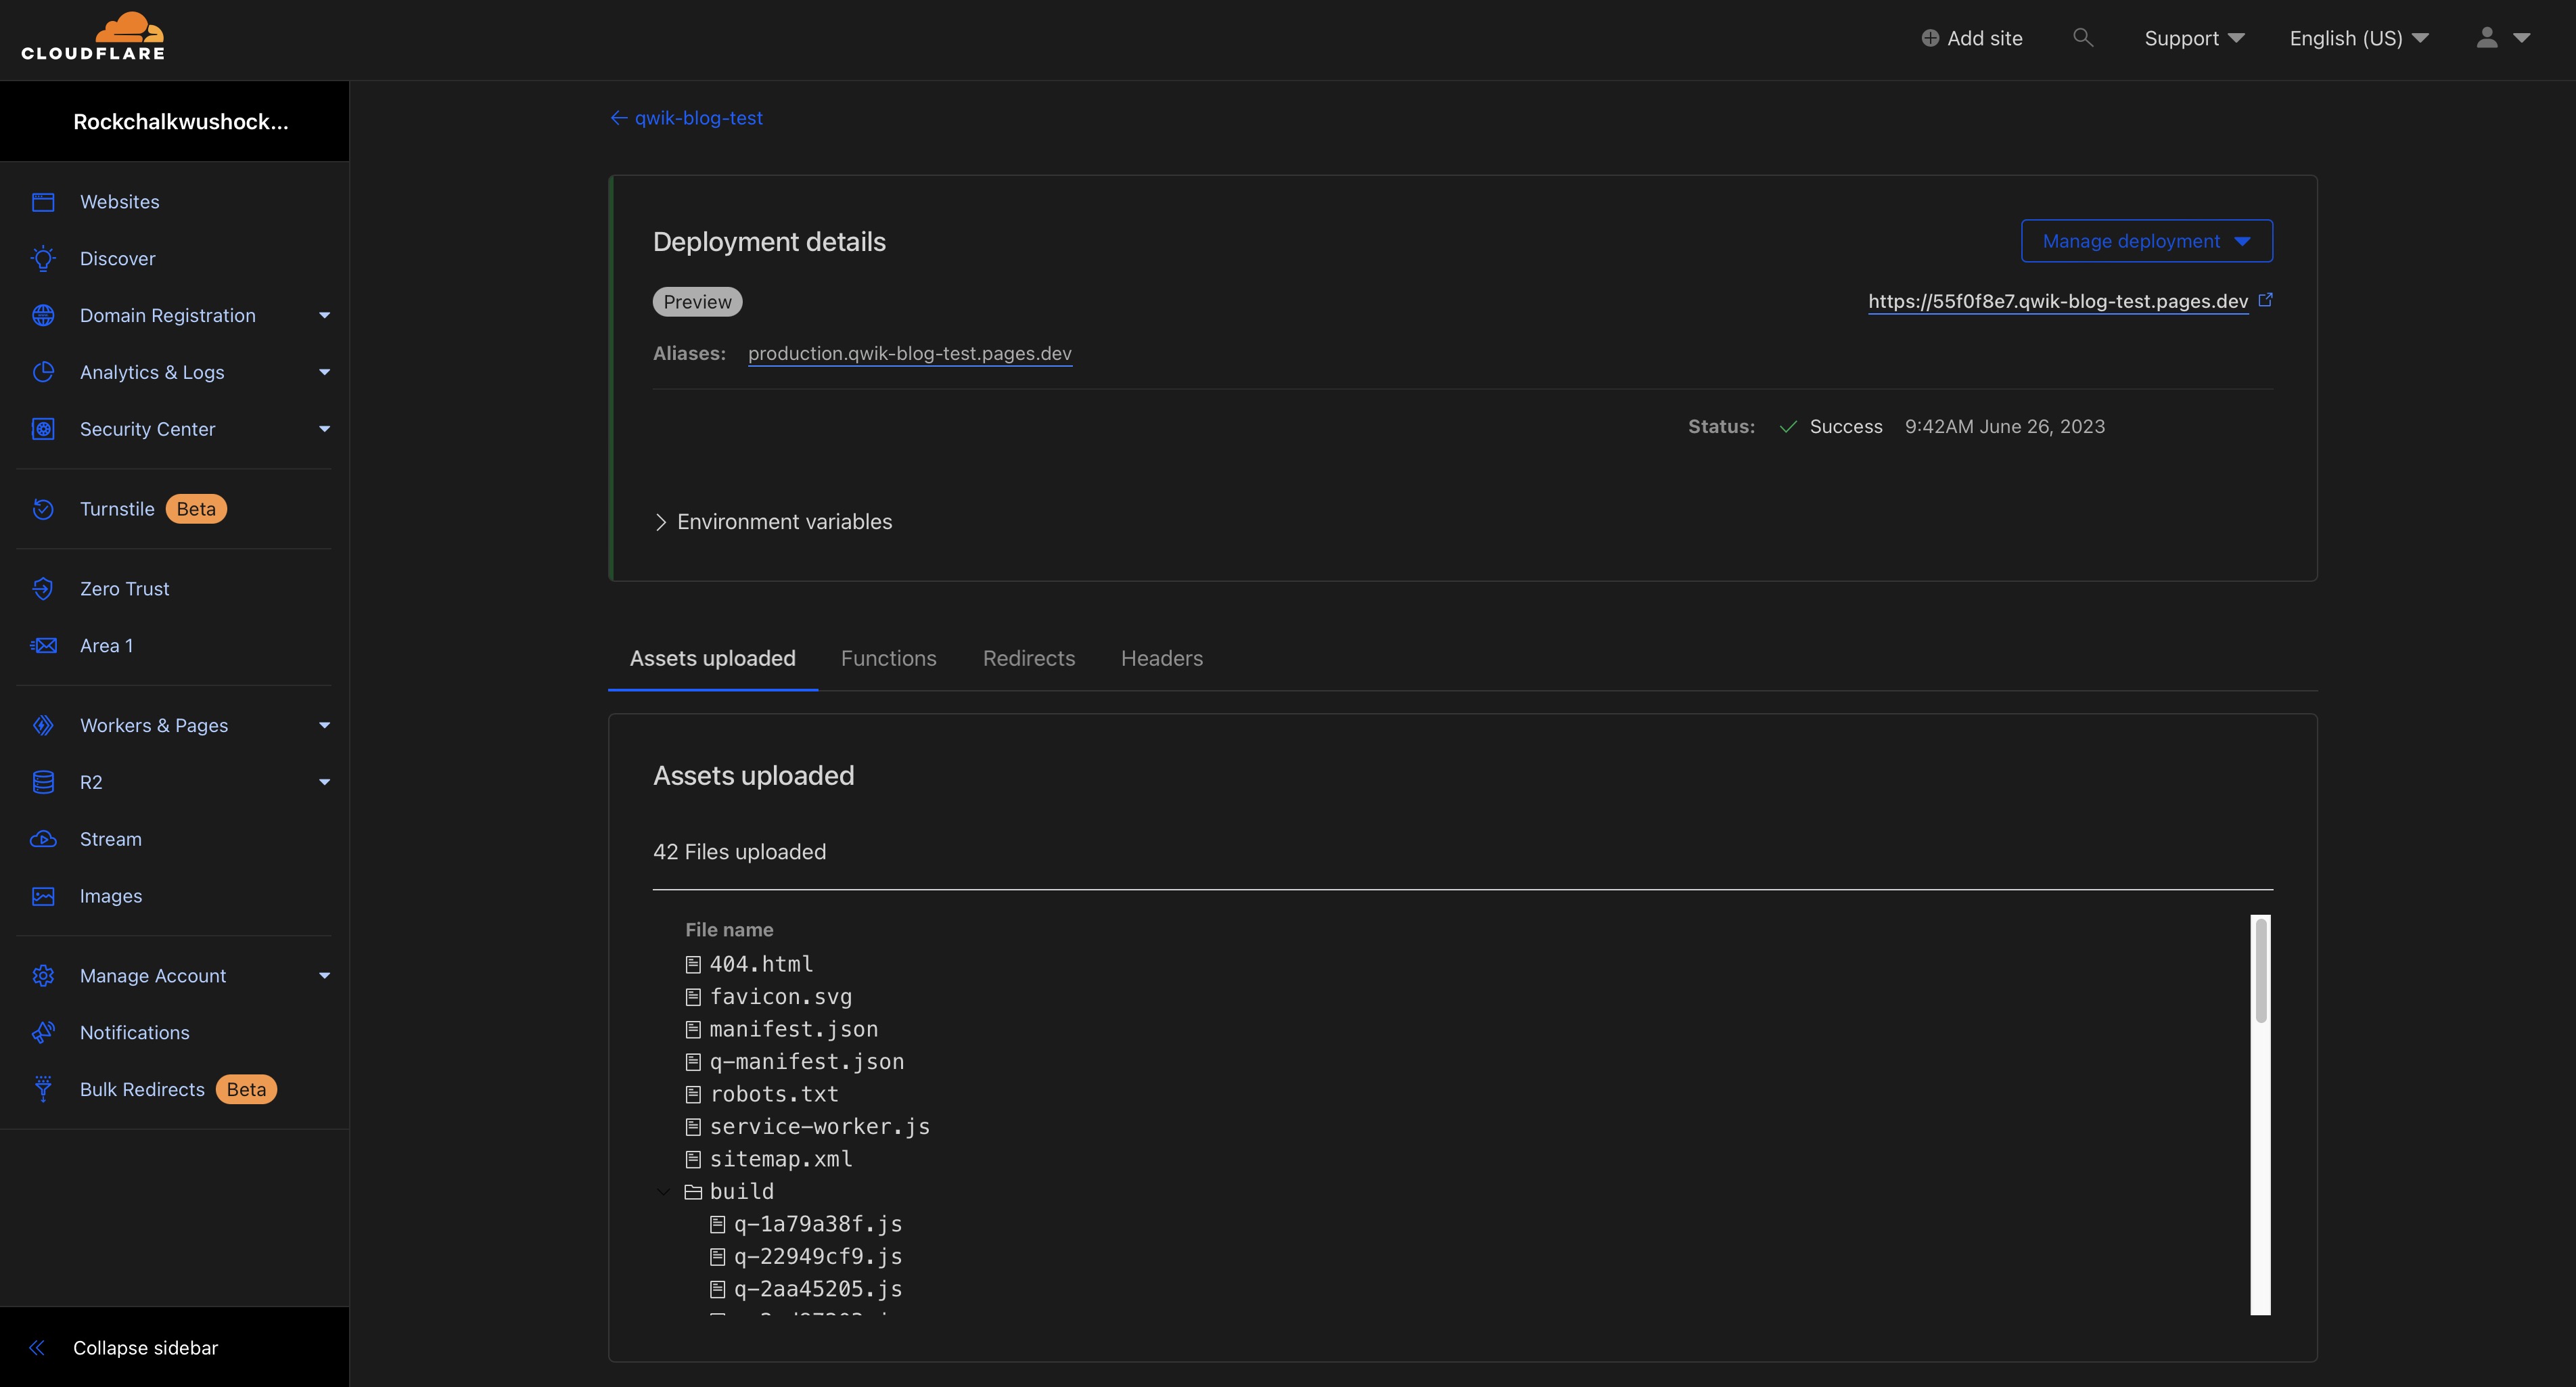
git push -u origin production # this will be "main"After pushing to GitHub we can either navigate to the repository on GitHub and click on the "Actions" tab or we can navigate to our Cloudflare Pages Dashboard and see the deployment in progress. Once the deployment has finished we can click on the "Visit Site" button in the Cloudflare Pages Dashboard to see our application live.
Wrap Up
We have now successfully deployed a Qwik-City application to Cloudflare Pages via GitHub Actions. You can find the repository for this blog post here.

Cody is a Christian, USN Veteran, Jayhawk, and an American expat living outside of Bogotá, Colombia. He is currently looking for new opportunities in the tech industry.